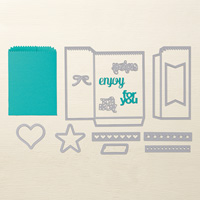
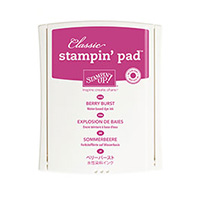
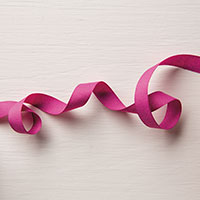
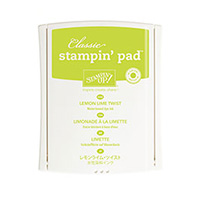
For my projects today, I used the brand new Spooky Cat stamp set which comes out this September, along with the Mini Treat Bag dies. If you take a closer look at the treat bag set, you'll notice it comes jam packed with all kinds of dies. There are even fun shape dies to add dimension and interest to your cute little bags. I plan to use it for my daughter's class to hold Halloween treats in. To create the bubbly potions, I took some watercolor paper and first stamped the bottles in Basic Black Archival ink and the added each color of liquid in Bermuda Bay, Berry Burst, and Lemon Lime Twist. The liquid parts of the potions are separate stamps which include some bubbles that, when stamped, bubble out of the tops of the bottles. I wanted to add more variation in the bubbles so I took the bubbles from the stamp set Mixed Drinks and stamped a few of those in the same colors. Then I took my aqua painter and colored over the potions to make the color run a little for a steamy, bubbly look. I also wanted to add some texture behind my die cut circles, so I took some Finely Woven Berry Burst ribbon and added some behind them. I also took some of that same ribbon and unraveled it. At first I only intended to use the thread that I pulled from the ribbon, but as I unraveled it, I thought the loose edges would be so pretty behind my circle pieces too. Here's a picture of how I pulled the thread to unravel the ribbon:
After I added my ribbon, I added a few more touches and details to finish off the treat bag and I was on to my which hat.
The witche's hat was actually inspired by a project kit that Stampin' Up! offered a while back. It's really quite simple. You can easily create this project in any size you like; just play around with your paper and experiment with different sizes. I first cut out a circle out of Basic Black cardstock, using a small bowl from my kitchen as a stencil. Then I took a sheet of Basic Black cardstock and made a snow cone shape where it's curved at the top and cone shaped at the bottom, proportional to the base or brim of the hat. You may need to just test out different sizes until it looks like the right size. Then I rolled it so that the cone end came to a point which ends up being the top of the hat. Then I adhered the edges. Next I took a 1/2 inch strip of black paper and snipped up the center of the paper running horizontally so it creates a sort of fringe. I adhered the non fringed side to the inside of the bottom of the cone part of the hat and folded the fringed edges out and used those to adhere to the circle base part of the hat. After the basic structure of the hat was made, I crumpled the tip up a bit to add texture and age. Then I took some ribbon and sequin trim and wrapped it around the brim of the hat. Lastly, I stamped the rat from the Spooky Cat set and added it to one side. And that pretty much finishes my projects for today! Thanks so much for stopping by and I'll see you next post!
DON'T FORGET:
Use your Bonus Days coupons! For every $50 you spent July 1-31 (before shipping and tax), you will have received a $5 Bonus Days coupon via email that you can use NOW, August 1-31.
To order online:
August 2017 Hostess Code:
3QTSD6RN
Check out the gorgeous new holiday stamp and die set Carols of Christmas! This is a very special pre-release. Now, during the month of August, you have early access to one of top bundles from the upcoming holiday catalog which doesn't release until September! Plus, this special early release comes during our Bonus Days promotion—which means if you earned Bonus Days coupons in July, then you can use them on Carols of Christmas in August!
The brand new holiday catalog is coming in September, so mark your calendars! It's packed full of beautiful and stunning products, gift ideas, and project samples, perfect to get your holidays off to a great start. For now I can only tease you with the cover of the catalog, but trust me, you are going to LOVE these great new products! Starting September 1st, you can see the whole catalog and order!
With so many amazing, beautiful items provided for you, you'll be able to get your brand, new business off to a fast start-AND spend your Starter Kit dollars on things like your favorite stamp sets and accessories, so there's no better time to join! For just $99, you can select $125 of your choice of product AND you'll be able to pre-order from the brand new Holiday Catalog as earn a 20% discount on your purchases from there Annual Catalog. This is amazing deal! You If you'd like to join my team, click here to sign up or email me @Craftylittlepeach@gmail.com.







I need to do this now. After all, a witches hat is my logo and you've used all my favorite colors. Needless to say I am in LOVE with this project!
ReplyDeleteOh that's right, Natalie! You absolutely must now, lol! Thank you!
DeleteI love everything about this Lauren. That hat is super cute and your colour choices, spot on! Great projects ♥
ReplyDeleteThank you so much, Paula! That means so much! 😊
Deletewhat size card stock did you use for the hat? 12X12 or 8 1/2 x 11?
ReplyDeletevery cute project, thanks for sharing
Hi GG! Thank you so much! I'm so glad you liked it. I used an 8 1/2 x 11 cardstock piece. 😊
DeleteDon't hide your illness to yourself my dear fellow warriors, are you trying to get rid of any illness? Dr. Agbon is your final hope, because he cured me from HPV1&2, with his herbal root medicine. Contact him On WhatsApp +2348050495479 and get cured too. or email him at dragbonherbalmedicine@gmail.com.
ReplyDelete