Thursday, September 22, 2016

Shake and Celebrate Smooshing Wedding Card Technique

Hello Peaches! Today I bring you a quick card, showcasing the Shake and Celebrate bundle from Stampin' Up!. This bundle is so fun! It's designed to make shaker cards with fun layers and with tons of variety in this set, your choices are virtually endless.

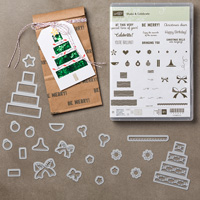
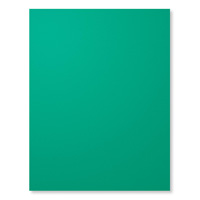
Although, as I mentioned above, that this set can be used to make AMAZING and STUNNING shaker cards, my design is a bit more simple today. I wanted to create a simple, yet elegant wedding card. This is so easy to do and this set makes it so fun!

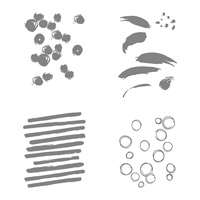
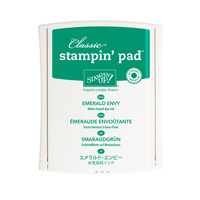
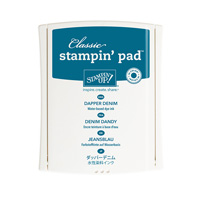
Today I used the "ink smooshing" technique. Now this technique had been around for a while, but I still LOVE the process, and the great thing is that you will never get the same results each time you do it. All you need to do this is water (I like to use my Stampin' Spritzer for the best results), some ink of your choosing, and a piece of acetate. Now you may choose any color combo you like but keep in mind that when some colors are mixed together, or too many, you can get a "muddy" look. You can also choose to dry each color in between uses, to avoid any unwanted mixing of color.

I start by taking my watercolor paper and stamp my image in Versamark ink, then add Whisper White embossing powder and heat set it. Now any ink you add will resist the image. Next, I take a piece of acetate (just a semi-small piece that you'll be able to easily  maneuver over your piece of paper) and add some ink from my ink pad onto the center of the acetate. NOTE: I either use watercolor paper for higher saturation of ink/water or thick Whisper White cardstock as it absorbs the ink/water well without pilling. Now you don't need a lot of ink-think "less is more" for this technique. If you find yours is not as vibrant in color when it's dried, just add more. After adding the ink, I take my spritzer (filled with water) and from about 12 inches away from the acetate, I spritz the ink with water, just until I see the ink begin to bead up. The flip it over so it faces down, towards your paper and just lightly touch it to the paper, smooshing it however you please until you get the look you like. I love how enjoyable and relaxing this process is.

After you're done "smooshing", let it dry either by air or if you're impatient like me, you can use your heat tool. You may get some warping from your paper, so what I like to do it run it through my BigShot with just the platform and adapter plate, along with two cutting pads (preferably without any cut marks as this can imprint on your card).

To finish my card off I added a sentiment from the Happy Happenings stamp set, which I just broke into 4 separate pieces and heat embossed it in Whisper White  embossing powder on basic black cardstock. Then I took the "congrats" die from the Sunshine Wishes thinlits dies and die cut it, first, 3 times out of thick Whisper White cardstock and added one more that was die cut out of gold glimmer paper and added it to my card front for an added piece of dimension. I also cut the heart from that same thinlit set out of the gold glimmer paper and adhered it to the top left corner. Lastly, I adhered it to my card base which was made out of thick Whisper White cardstock, and that finished off my card! Thanks so much for stopping by and as always, all supplies used for this card are listed below. You can just click on the links below and they will take you directly to the product! Thanks and see you next post!


check out my store:
Make sure you see my name in the upper right hand corner of the page or select "find a demonstrator", then "demonstrator directory" and search my name, Lauren Alarid. If you don't select me, I won't know who to thank for the order. Email me with any questions at Craftylittlepeach@gmail.com 
You can also check out my Pinterest Board:

Tuesday, September 20, 2016

Vintage Leaves Embossed Ink Splatter Card

Happy Tuesday Peaches! I don't know about you, but here in California, we've had just a little taste of fall weather. It's been just beautiful. I guess that's what put me in the mood to do this card. Though I wanted to try something a little less traditional as far as colors. I love how the Crumb Cake cardstock looks with Bermuda Bay.

I first started with Bermuda Bay cardstock for my base. I then took a piece of Crumb Cake cardstock, and I wanted to create a background out of words. Since the Vintage Leaves set, though stuffed with lovely, delicate leaves, does not include a sentiment stamp, I chose one with a flowy looking font from the Blooms & Wishes. I stamped one of the sentiments from this set in Versamark ink and created a fun embossing mixture from gold embossing powder, mixed with Gold Stampin' Glitter, and heat set it.

Next I did the same process with the leaves, except I stamped them on Whisper White cardstock. I used the coordinating dies to cut them out. I also took my Aqua painter, dipped it in some Bermuda Bay ink and flicked it on the leaves to create a splattered look on them. I cut some vellum in a fun wave and trimmed it to fit the bottom right corner of my card. I also cut the "thanks" from the Hello You thinlits set out of Whisper White cardstock and assembled my card. I finished it off with some gold twine and Bermuda Bay sequins from the Brights assortment and that finished off my card! Thanks so much for stopping by and as always, all supplies used for this card are listed below. You can just click on the links below and they will take you directly to the product! Thanks and see you next post!


check out my store:
Make sure you see my name in the upper right hand corner of the page or select "find a demonstrator", then "demonstrator directory" and search my name, Lauren Alarid. If you don't select me, I won't know who to thank for the order. Email me with any questions at Craftylittlepeach@gmail.com 
You can also check out my Pinterest Board:

Saturday, September 17, 2016

Playful Backgrounds and Sunshine Wishes Ombré Watercolor Card

Hello Lovely Peaches! I have a fun card to share with you today. I've been really enjoying watercoloring lately and wanted to try it with the beautiful new in-colors, Emerald Envy and Dappe Denim.

I started with a piece of watercolor paper and squeezed a little ink into the lid of both my Emerald and Denim ink pads so that I could use my Aqua painters to paint with it. The key to watercoloring is the amount of water you add. If you want a more bold look, you use less water. If you are wanting a more washed out, lighter result, you'll want to use more water. It's always helpful to test the technique out on scratch paper but keep in mind that watercolor paper can hold a lot more water and ink.

After watercoloring my background with the two inks, I hear set it and the treated the entire surface with anti-static powder from my embossing buddy. This is and important step that will prevent embossing powder from sticking where it isn't supposed to. I then took the background stamp, from Playful Backgrounds, that looks like bubbles and stamped my background. I added white embossing powder and heat set it.

To create the ombré greeting, I used my ink sponges and ink blended Emerald Envy and Dapper Denim. After that, I just dipped the bottom third in Versamark ink and added a mixture of gold embossing powder and gold glitter and heat set that, and that's today's card! Thanks so much for stopping by and as always, all supplies used for this card are listed below. You can just click on the links below and they will take you directly to the product! Thanks and see you next post!


check out my store:
Make sure you see my name in the upper right hand corner of the page or select "find a demonstrator", then "demonstrator directory" and search my name, Lauren Alarid. If you don't select me, I won't know who to thank for the order. Email me with any questions at Craftylittlepeach@gmail.com 
You can also check out my Pinterest Board:


#TGIFC336 Color Challenge

   Hey peaches and thanks for joining me for another fun TGIF challenge this week! If you're new to the  TGIF Challen ges , each Friday,...