Wednesday, June 28, 2017

Stampin' Up! Beautiful Bouquet Thank You Card #GDP093

Hello, Peaches! How has your week been? So far mine's been pretty busy. My sister and her new baby, my daughter, and I went down visit some family in Chico, California. I absolutely love my family and it's always a fabulous time, full of happiness and laughs. I love catching up with them and hate to have to leave. It always leaves me wishing we had more time. Well, I better get on to today's card.

Today's card was inspired by the weekly challenge over on the Global Design Project page. This week's challenge is a color challenge, and what gorgeous colors they are!!!! Here's the weekly challenge:
Click here to see the challenge, along with all the fantastic projects that the team has created. I love each and every one!

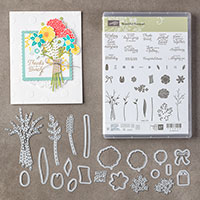
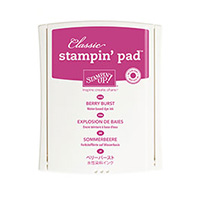
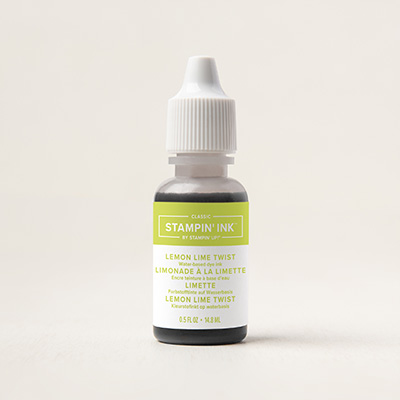
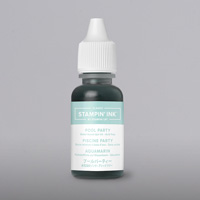
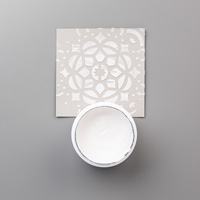
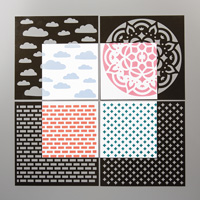
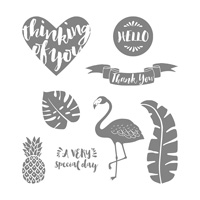
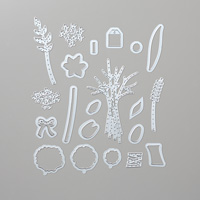
For today's card, I wanted to have lots of floral accents and a few different textures. To get this look, I used the Beautiful Bouquet stamp set and dies to stamp a piece of Whisper White cardstock in Lemon Lime Twist, Pool Party, and Berry Burst to create a floral patterned paper of my own design. Then I took a piece of Pool Party cardstock and heat embossed a few floral images in white. To add even more texture and interest, I took a small scrap of Berry Burst cardstock and, using Pool Party and Lemon Lime Twist re-inkers, I used my Embossing Paste and stencil to create a fun gradient pattern.

 I wanted to share a helpful tip when using stencils and embossing paste. I like to tape my project to the BACK of the stencil with washi tape. That way, it stays in place on the stencil as you add your paste and the tape comes off very easy so no tearing either! I've included a picture below:


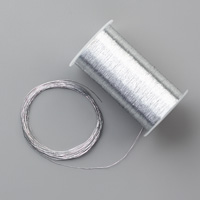
Next, I stamped my "supporting " sentiment in Lemon Lime Twist on the background of the base layer of my card in both 1st generation and 2nd generation stamping (stamp off once them stamp on your project) to add more interest. I added some silver twine and some silver enamel accents to finish it off and that's my card! Thanks so much for stopping by! 


Get your friends together and host a party to earn extra Stampin' rewards during the month of June! Contact me to book an event! 


To order online: Stampin' Up! Webpage
June 2017 Hostess Code:
37NWJG39

 If you’ve considered joining, it's a truly great time! For just $99, you can select $125 of your choice of product AND earn a 20% discount on your purchases from the Annual Catalog.  This is an amazing deal! If you want to join my team, click here or please email me!


Ho, ho, ho! Our Christmas in July promotion makes it more exciting than ever to sign up to be a demonstrator! New recruits who signed up in July will receive a FREE Essentials Gift Pack  which includes Paper Snips, SNAIL Adhesive, Grid Paper, two D Blocks ( One for you and one for a stamping friend), and a Bone Folder.  That's an added value of $52!  Additionally, you will get a taste of the perks of being a demonstrator; included in your gift pack is the new Carols of Christmas Stamp Set  from the holiday catalog for FREE ($20)!  

With so many basic items provided for you, you'll be able to get your brand, new business after the fast start-AND  spend your Starter Kit  dollars on things  like your favorite stamp sets and accessories, so there's no better time to join!  For just $99, you can select $125  of your choice of product AND  you'll be able to pre-order from the brand new Holiday Catalog as  earn a 20%  discount on your purchases from there Annual Catalog.  This is amazing deal! You  If you'd like to join my team, click here to sign up or email me @Craftylittlepeach@gmail.com


Monday, June 26, 2017

Stampin' Up! Pop of Paradise and My Color Process

Happy Monday Peaches! I wanted to share with you a little bit about how I color combo process works and how I choose my colors for my projects. I'm sure many of you find inspiration in many different ways. Some people find it in art, in fashion, some in nature, while others find it in common everyday things, like a coffee mug or an umbrella. I love finding inspiration in colors used around me. I shared in a previous post how I found inspiration from some gorgeous hydrangea blooms. There's so much color and artistic inspiration surrounding us all the time.

If your natural surroundings don't provide a spark in your creative process, there are a few other places you can look. One of the things that I love about Stampin' Up! is that they are so great about taking the guess work out of the card making process. The colors coordinate flawlessly, they provide tons of samples and project ideas, and are always creating beautiful product suites that are designed to coordinate with stunning color combos. No matter the occasion or design you have in mind for your projects, they are a great resource for inspiration. That is how today's cards came about.


In today's projects, I was actually inspired by a suite that has since retired. It was the super fun "Pop of Paradise" suite from last year's catalog. This suite had a fun flamingo set (that I am coincidentally using in today's projects) with fun pops of pink and black. I've included pictures from the retired suite below:


 I wanted to incorporate this look into my cards but with a little twist. I love the look of blues with pinks so I chose Flirty Flamingo, Pool Party, Bermuda Bay, the new Powder Pink, and of course a pop of black. You can see how fun and playfully these colors work together. So if you're in a creative slump, remember that you have a source that has already done all the hard work for you. You can find many project ideas and color combos on Stampin' Up!'s website, their Pinterest  board, YouTube, as well as their catalog (feel free to contact me if you are interested in receiving a current catalog). Have fun creating, and thanks for stopping by!


Get your friends together and host a party to earn extra Stampin' rewards during the month of June! Contact me to book an event! 


To order online: Stampin' Up! Webpage
June 2017 Hostess Code:
37NWJG39


 If you’ve considered joining, it's a truly great time! For just $99, you can select $125 of your choice of product AND earn a 20% discount on your purchases from the Annual Catalog.  This is an amazing deal! If you want to join my team,  click here or please email me!

Wednesday, June 21, 2017

Stampin' Up! Magical Mermaid Card #GDP092

Hello Peaches! I'm popping in to share my submission for the Global Design Project weekly challenge. For this week's challenge, we are CASEing the lovely Steffi Helmschrott. If you haven't heard of what "CASE" means, it's basically this-copy and selectively edit. That could mean you were inspired by the stamp set they used, the technique, the colors, etc. Essentially, the original design has inspired you in some way to create your own project. Check out all the amazing projects the design team has come up here with-truly stunning!


Here's Steffi's original design.

Updat! I won this week's challenge!!


I was immediately taken in and inspired by the watercoloring in Steffi's design. I love the realistic look it creates with the water element in her card. If you know me, you know I can't resist a watercoloring opportunity, so that's just what I did for my card today. I began with some watercolor paper and used Lemon Lime Twist from the bottom moving in a gradient towards the top and Bermuda Bay from top to bottom. Before I add the ink though, I like to add a layer of clean water to my paper with my aqua painter first so that the ink will spread in those areas only. Also, this helps to reduce any harsh water marks/lines. Next, to add the ink, I just take my ink pad, and while it's closed, squeeze the top and bottom together a bit so that the ink pad will touch the inside of the lid a bit, leaving ink in the well of the lid. I take my aqua painter and pick up a bit of ink at a time and add it to my paper. (Just a note: if you saturate your watercolor paper too much, this can also cause harsh water lines when it dries because the water will pool towards the edges as your project dries. So if you'd like to add more color, I suggest drying your project in between adding each new layer of color.) I just love how these two colors mix in the middle to create a rich, bright green.

Now what would a beautiful watercolor background be without a magical mermaid to swim in it?! I used the mermaid from the Magical Mermaid set and watercolored her as well. Then I used the tranquil seaweed looking stamp to create a peaceful ocean background. I also wanted some greenery so I used some dies from the Bouquet Bunch dies. I watercolored some more paper and die cut from that so that the plants would have an ombré gradient look as well. To finish off my card, I added some tiny pearls to my "sea blossoms", some Wink of Stella to the mermaid's tail (every mermaid should have some glitter, right?), and a few sequins for "bubbles". I really love how it turned out! Well, that's my card for today! Thanks so much for stopping by! See you next post!

Here are a few up close photos to hopefully show the glimmer on her tail:


Get your friends together and host a party to earn extra Stampin' rewards during the month of June! Contact me to book an event! 


To order online: Stampin' Up! Webpage
June 2017 Hostess Code:
37NWJG39


#TGIFC336 Color Challenge

   Hey peaches and thanks for joining me for another fun TGIF challenge this week! If you're new to the  TGIF Challen ges , each Friday,...