
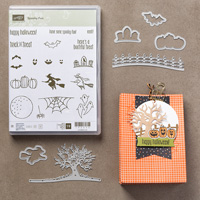
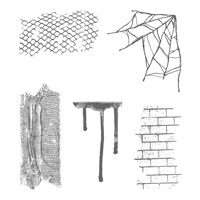
Hey Peaches! It's starting to cool off a little bit here where I live; which is putting me in a ready-for-fall type mood. There are some really fun and beautiful stamps that will will be released from Stampin' Up on September 1st, so I thought I'd give you a sneak peak at some of the fall themed sets. The sets I used today are the Spooky Fun photopolymer bundle, featuring both the Spooky Fun stamps and coordinating dies, and the Ghoulish Grundge clear mount stamp set. I wanted to create a fun background, so I used he brick wall stamp and did a tone-on-tone background, using both Smokey Slate ink and cardstock. The great thing about these products is that they are designed to coordinate seamlessly together In this background you can see that it created fun, almost watermark, effect.

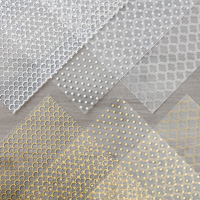
Then I wanted to create the shaker portion of my card. I cut out two banners, one from my brick stamped layer to allow for and in-lay to place the banners, and another (the same size) from one of the patterns from the fabulous foil designer acetate. At this time, I also stamped, in Basic Black ink, the spider web twice, rotating the stamp to make it face the last stamped web on vellum, and added clear embossing powder and heat set it. By the way, he black ink is fast drying so if you plan to heat emboss, you need to move quickly. Also, vellum is very delicate and can become very brittle if it gets too hot. I like to let my heat tool warm up a bit before using it on the vellum, and it will set quickly, so keep that in mind.


I arranged everything how I wanted it on my card before adhering any layers. I needed to create my well for the shaker next. I flipped over the top layer, with the banner cut from the center, and added my window sheet. after that, I started to line the backside of the front layer, around the banner, with foam adhesive strips. when making shaker cards, it's important to be sure that there are no gaps between the foam adhesive as the shaker contents can escape.

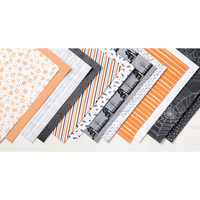
After I had my well created and added my shaker contents, I added it to the top of my Smokey Slate layer. At this point I felt like it was missing something so I cut a strip of pattern paper from the adorable new Halloween Night Specialty Designer Series Paper (also available September 1st). I really love this paper! It has some truly stunning designs, perfect for those "Spooky Fun" projects. I also cut another larger banner out of Basic Black cardstock and added it as a border. I cut a spooky tree from some Basic Black cardstock with the coordination die set and a few matching banner strips, with my sentiment, and the last touch was to add some bakers twine. And that's my card for today!


Thanks for stopping by and as always, all supplies used for this card are listed below. The stamp bundle will be available staring September 1st. You can just click on the links below and they will take you directly to the product! Thanks and see you next post!
Check out my store:
Make sure you see my name in the upper right hand corner of the page or select "find a demonstrator", then "demonstrator directory" and search my name, Lauren Alarid. If you don't select me, I won't know who to thank for the order. Email me with any questions at Craftylittlepeach@gmail.com
You can also check out my Pinterest Board:


No comments:
Post a Comment
Note: Only a member of this blog may post a comment.