
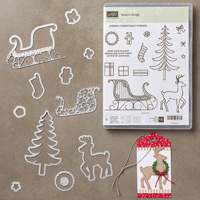
This card was so much fun to create! As many of you know, I've really been loving working with the ink blending technique. Which by the way, you can check out in my previous blog tutorials if your curious about the technique. But I knew, when I planned this card, actually if we're being honest here, I've planned this card since I first laid eyes on this stunning bundle from Stampin' Up! But I knew that I wanted to create this peaceful, deep sky background for my sleigh. Now you could use this set for so many beautiful things; it's so versatile. You could create gorgeous Christmas tags, a fun calendar to countdown to the holidays, make fun 3-D projects for home decor or even table decorations for holiday get togetherness! I mean the possibilities are endless!
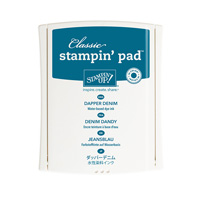
For my first project though, I really wanted to create this design. I wanted the trees to be almost shadow ms in the background so I used Basic Black cardstock and cut them out seamlessly with the coordinating dies. And by the way, these gorgeous sets will be available to purchase through Stampin' Up! on September 1st and I have a feeling they'll go fast! This does set has such gorgeous intricate designs such as the sleigh. I also wanted to create more dimension to the sleigh so I cut it out several times and then adhered each piece to each other, creating a thicker version of the sleigh. Well next I thought about the flourished layer of the sleigh and it was just screaming at me to use some silver glimmer paper and I love the results. Now I was afraid that the rest of the sleigh would get lost in the background so I just took the white chalk pen to add some details and I think it turned out nicely. For the snow bank, I simply cut a hilly-type mask and added some Whisper White ink, along with some white embossing powder. Just a note: as the white ink is a pigment ink, it dries slower so be careful not to smear it before it dries. Since I covers mine in embossing powder and then heat set it, I didn't have to worry about smearing it. For the snowflakes in the night sky, I just stamped in Versamark ink (another slow drying ink) and then added more white embossing powder and heat set it. Lastly, I didn't want to cover up the beautiful night sky so I cut a piece of vellum and stamped the sentiment, also in this set, in StazOn black ink. Now be careful when using this ink on slick surfaces as it can smear easily. But that is my card for today! Thanks for stopping by and as always, all supplies used for this card are listed below. The stamp bundle will be available staring September 1st. You can just click on the links below and they will take you directly to the product! Thanks and see you next post!


Check out my store:
Make sure you see my name in the upper right hand corner of the page or select "find a demonstrator", then "demonstrator directory" and search my name, Lauren Alarid. If you don't select me, I won't know who to thank for the order. Email me with any questions at Craftylittlepeach@gmail.com
You can also check out my Pinterest Board:


No comments:
Post a Comment
Note: Only a member of this blog may post a comment.