
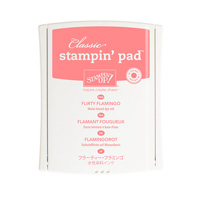
My watercolor card was begun by using Peekaboo Peach and Flirty Flamingo Classic Stampin' Pads. I'll briefly explain how to use your ink pad to watercolor with as I have explained in further detail in previous posts. You will squeeze the closed pad together so that the lid will lightly touch the pad inside and collect ink in the well of the lid. Then you take your Aqua Painter and dip it in the ink.
You can choose to add as little or as much water as you like to the ink well. However keep a few things in mind. The more water you use, the lighter, more diluted the color will be. Likewise, the less you use, the more vibrant and concentrated your color will be. I recommend starting light and then adding more color. If you add too much color, the beauty of watercoloring is that you can easily remove some of the color by adding clean water with your painter. Keep in mind that these tips/tricks only apply when using watercolor paper. If you use regular cardstock the ink will behave differently. Another important tip is that if you have used a lot of water, when you are finished with your project you will need to clean out the lid with a paper towel or napkin do that any extra residual water does not transfer to your ink pad as this will result in a diluted ink color in your pad.

So now that we've discussed a few watercoloring tips, I'll explain how the rest of the arcade came together. The watercoloring part is quite simple in that it's quite an organic process. You just pick up some ink with your Aqua Painter and choose where you'd like the color. I started with a piece of 4" x 5 1/4" piece of Watercolor Paper and began in the upper right corner. I started with Peekaboo Peach as it was the lighter of the two colors and I knew I could easily overlap it with the Flamingo ink later. At this point you can choose to let the ink dry and add more color for a brighter result or as I have done, begin adding the Flirty Flamingo ink. The other benefit to adding the second ink right away is that the colors will mix and blend together. If you do not want this, I recommend letting the first color dry before adding the next, but I was going for a softer, blended look so I didn't wait for mine to dry in between.
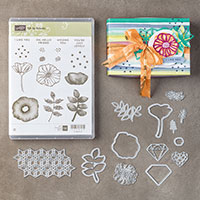
After I allowed my project to dry, I took one of the smaller patterned stamps from the Oh So Eclectic stamp set (looks like a bunch of small "+" signs) and stamped it around the area in Flirty Flamingo, where I had watercolored. I found after doing this that the stamped images where not subtle enough for me so I took my Aqua Painter and went over them to soften them. As that party dried, I stamped and die cut a few leaves from the Eclectic bundle and watercolored them as well.
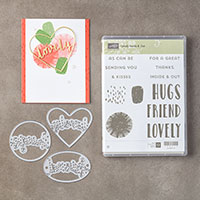
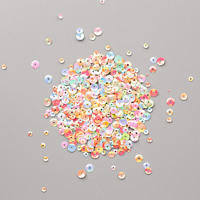
I also used the largest die from this bundle for an accent in the background. This large angled die is intended to just die cut the negative spaces, leaving behind a fun shape within your project. However, I decided to cut out the entire shape from my cardstock. I did this 3 times so that I could adhere them all together so that I had a thicker chipboard type piece afterwards. Then I adhered it to my watercolored panel. For my sentiment, I took the heart shaped die with the word "lovely" in it and die cut it out of Peekaboo Peach and just cut the word from it. I also stamped a coordinating sentiment in Flirty Flamingo ink and adhered both to a vellum heart. I added a few sequins and that finished off my card! Thanks so much for stopping by and I'll see you next post!


To order online:
September 2017 Hostess Code:
XS6WHQQW
Or email me @ Craftylittlepeach@gmail.com
If you’ve considered joining, it's a truly great time! For just $99, you can select $125 of your choice of product AND earn a 20% discount on your purchases from the Annual Catalog. This is an amazing deal! If you want to join my team, click here or please email me!
Say Hello to the Merry Patterns Host Promotion!


What could make hosting a holiday catalog event more fun? How about the chance to earn a FREE, exclusive stamp set? We’re calling it the Merry Patterns Host Promotion—and anyone can join in the fun. Here's how it works: if you host a party with $300 USD/$375 CAD in sales by October 31, you'll earn the Merry Patterns Stamp Set for FREE. The Merry Patterns Stamp Set is exclusive to this host promotion and will not be available after the last day of October, so grab it while you have the chance! There's also a great video with gorgeous samples to help you get a head start on making beautiful Christmas cards and projects with your “merry” new set. Check out the video below:


No comments:
Post a Comment
Note: Only a member of this blog may post a comment.