
Well, onto today's project. I had quite a few girls on my team that were curious as to whether or not embossing powder could be used with the brand new embossing paste, so I experimented. I actually wasn't completely sure of what to expect for the outcome but I had some suspicions. In the past, to speed up drying time, I would use my heat tool. I found that if you let your heat tool get good and hot (about 30 seconds) and sporadically expose your paste to the heat in short bursts, you can dry it faster. However, if you expose it too long, it will bubble and crack. So I kept this in mind for my project using the powder and paste.
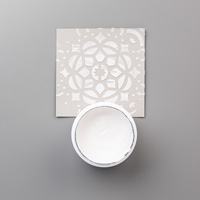
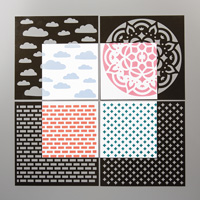
First, I watercolored my background in Tempting Turquoise with my aqua painter. After that I dried, I wanted puffy clouds for my background, so I used the cloud stencil and spread my embossing paste. I wanted it to be a bit thicker because I was going for a "puffier" cloud look, so I applied it thickly over the stencil. Then I took my white embossing powder, mixed it with some Dazzling Diamonds glitter, and quickly added it to the paste. This is important because if the paste dries before you add the powder, it will not stick and emboss properly.
The next step was to dry it with my heat tool. I applied the same knowledge that I learned from hearing the paste on it own to how I used the powder with the heat tool. I was careful to not over heat it but I did want the paste to bubble a bit since I wanted my clouds to be puffy, so I used the heat tool just until it began to bubble. Then I pulled it away and it creates a really fun effect. I've included a close up of the clouds below so you can get an idea of the dimension that was created. I just love the paste and look forward to finding even more great and creative ways to use it. Thanks for stopping by and see you next post!


Check out these AMAZING deals happening in July! You will NOT want to miss these!

Bonus Days are back! For every $50 you spend July 1-31 (before shipping and tax), you'll get a $5 Bonus Days coupon that you can use August 1-31.
To order online: Stampin' Up! Webpage
July 2017 Hostess Code:
A643VXMA

Then, during the month of August, you will have early access to one of top bundles from the upcoming holiday catalog! Plus, this special early release comes during our Bonus Days promotion—earn in July, then use it on Carols of Christmas in August!

Ho, ho, ho! If Bonus Days weren't enough, our Christmas in July promotion makes it more exciting than ever to sign up to be a demonstrator! New recruits who signed up in July will receive a FREE Essentials Gift Pack which includes Paper Snips, SNAIL Adhesive, Grid Paper, two D Blocks ( One for you and one for a stamping friend), and a Bone Folder. That's an added value of $52! Additionally, you will get a taste of the perks of being a demonstrator; included in your gift pack is the new Carols of Christmas Stamp Set from the holiday catalog for FREE ($20)!
With so many basic items provided for you, you'll be able to get your brand, new business after the fast start-AND spend your Starter Kit dollars on things like your favorite stamp sets and accessories, so there's no better time to join! For just $99, you can select $125 of your choice of product AND you'll be able to pre-order from the brand new Holiday Catalog as earn a 20% discount on your purchases from there Annual Catalog. This is amazing deal! You If you'd like to join my team, click here to sign up or email me @Craftylittlepeach@gmail.com.


Wow what a super cute card and great tips on mixing embossing powder and the embossing paste to achieve a puffier sparkly cloud. Going to try this.
ReplyDeleteThank you Penny! You should definitely try it! It's such a neat look! Thanks for stopping by! 😊
DeleteDid you just sprinkle the embossing powder on the paste, and pour the excess away like when you use Versamark? Or do you have to pat it on the embossing paste?
ReplyDeleteIs it always going to bubble up like your clouds? Or can you get the embossing powder to glisten without it bubbling up?
Hello! Yes, I just pour the powder right over the paste and then tap off the rest. I didn't need to pat it into the paste so long as I applied it right away. As far as puffing up, it seems to always bubble after being exposed to your heat tool for a certain amount of time. If you don't want it to puff up, do short quick spurts of heat until it dries and don't heat for too long. I hope that helps. 😊
Delete