

Well, hello peaches! Welcome to the Sailing Away Stampin' Up! Artisan Design Team Blog Hop! Each month our very talented and creative team of designers will be bringing you inspiration, so get comfortable and have a ton of fun hopping along with us. You may have just arrived from the wonderfully talented Kaylee Van Es' Blog. Just over the moon about what she has created!

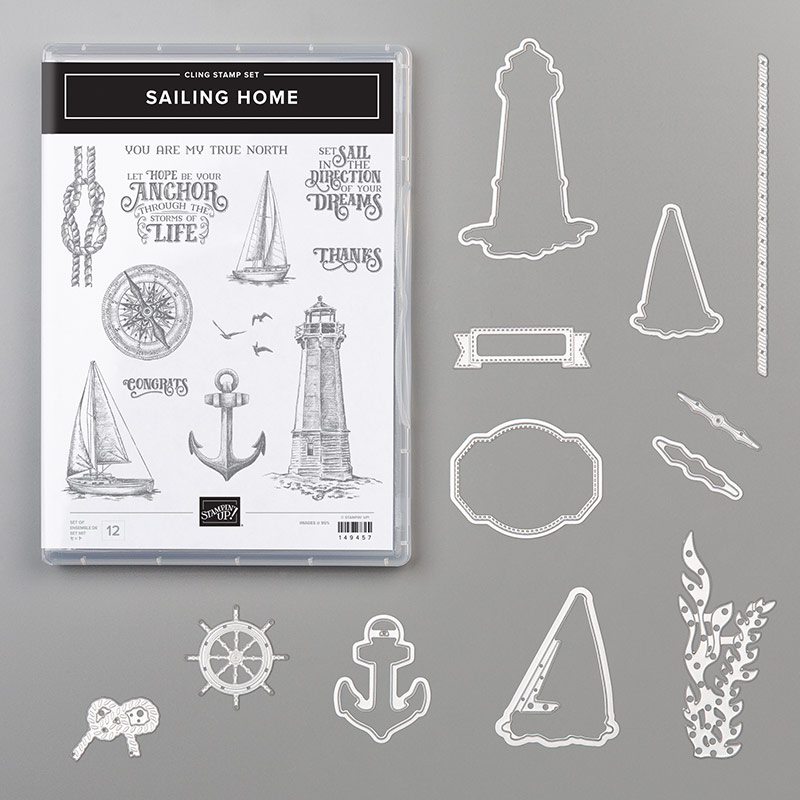
Today, we will be showcasing the Sailing Home Bundle. These products come from the Come Sail Away Suite, in the brand new Annual Catalog, and all coordinate beautifully with cool little trinkets, nautical themed DSP (Designer Series Paper), and gorgeous thick baker's twine-everything you need for that masculine or ocean themed card! One of the things that I love about this set is that it is ocean themed. I'm a sucker for those types of sets. The images and fun font just make this such a fun set to stamp with.There are 12 stamps and 12 dies. Additionally, there are some fun dies that create embossed designs when cut out. There are so many possibilities!
For my card today, I wanted to have a layer that had a "wave" look to it. There is a new wave embossing folder in the new catalog, but I wasn't able to get it yet so I had to get creative. I used one of the laser cut cards from the Come Sail Away Memories & More Card Pack. It's supper easy to do and creates a unique, textured look.

Here's how you do it:
- First, take a piece of Balmy Blue Cardstock (or any color) and place the "wave" looking laser cut card (pictured above) over top of it..
- Next, sandwich it in your die cutting machine just as you would to die cut, NOT EMBOSS. You can add additional shims for more added depth and texture.
- Then use a Stamping Sponge and your Balmy Blue Ink to ink onto your embossed cardstock to really accent the embossing.

Here's one more close-up of all of the details:

These products were so fun and inspiring and I know I had a blast using them. I hope you have enjoyed today's card and design (full list of supplies below). Keep hopping along and check out my other fellow teammates’ pages. They have some pretty amazing projects to share. I’ve listed them, along with all products used below or you can just click the link below to hop to the fabulously creative Maike Beimler.
Don't forget: Stampin' Up! features a corporate blog post each Thursday of the month where we Artisans share creative tips, tricks, and strategies. You can find these posts in the "notes" section of the Stampin' Up! Facebook Page.Thanks so much for stopping by and I’ll see you next post!

2019 Stampin' Up! Artisan Design Team
Thanks so much for stopping by and I'll see you next post!
Don't forget! You can find me on Instagram and Facebook! Happy stamping!The brand new catalog is live! Check out this awesome stop motion video:
Use my host code (ZSBK6EH2) for monthly bonus items. Contact me for more info: Craftylittlepeach@gmail.com
Host A Party
Get your friends together and host a party to earn Stampin' rewards during the month of June! Contact me to book an event!
To order online:
June 2019 Hostess Code:
ZSBK6EH2
Or email me @ Craftylittlepeach@gmail.com
ZSBK6EH2
Starting January 3, hosts with qualifying orders can receive additional Stampin’ Rewards. Below are the markets, qualifying amounts, and additional Stampin’ Rewards they can receive.


If you’ve considered joining, it's a truly great time! For just $99, you can select $125 of your choice of product AND earn a 20% discount on purchases from the Annual Catalog. This is an amazing deal! If you want to join my team, click here or please email me!

Supplies:


Fantastic card Lauren! So clever to use the laser cut sheet to emboss with! Thanks for sharing your fabulous tip and gorgeous card! Rochelle xo
ReplyDeleteLove this card Lauren. You've got me wanting to buy a second pack of those cards just for those laser cut cards
ReplyDeleteStunning card Lauren and just love your great technique x
ReplyDeleteBeautifully detailed card. Love how you used the laser cut card to create your waves!
ReplyDeleteInteresting! So you used a die to emboss with? That is an awesome idea. My only problem is that, lol, I’m a visual person. Do you know if there is a ‘video’ of this technique? :)
ReplyDeleteLove, love this cards!
ReplyDeletexxManuela
Amazing!! What a brilliant tip to use the laser cut to add texture to your card - Hugs Emma xo
ReplyDeleteOh my gosh Lauren ... who would have thought to emboss with the laser cut pieces ... thank you so much for your ingenious tip! Opens up a whole new world with the laser cut papers too! Awesome card
ReplyDelete