

Well, hello peaches! Welcome to the Flowers For Every Season Stampin' Up! Artisan Design Team Blog Hop! Each month our very talented and creative team of designers will be bringing you inspiration, so get comfortable and have a ton of fun hopping along with us. You may have just arrived from the wonderfully talented Jan Clothier's Blog. She has made some lovely projects you're just going to love!

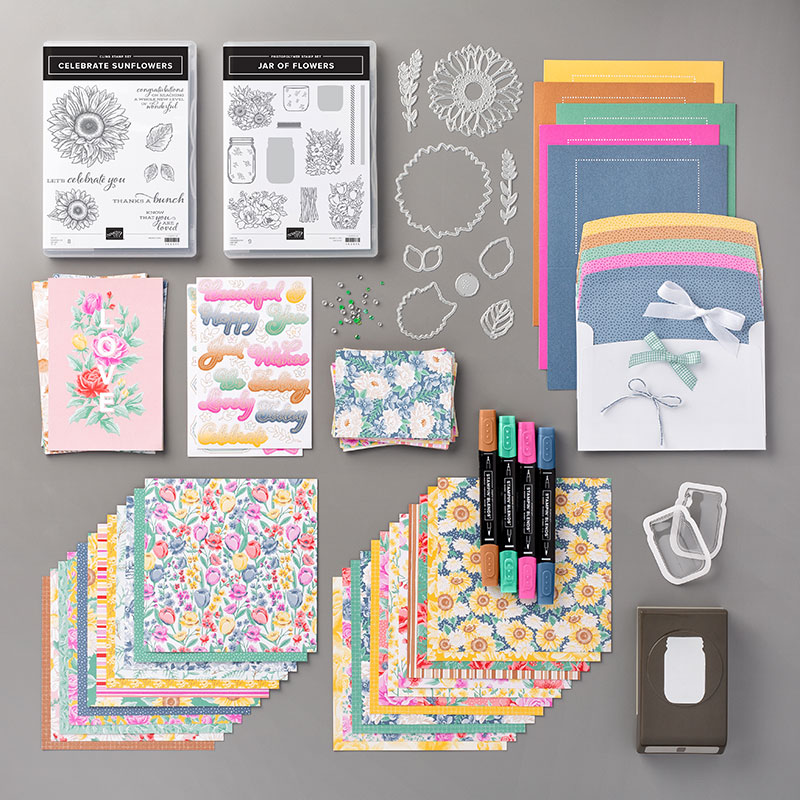
Today, we will be showcasing products from the Flowers For Every Season Suite found in the brand new Annual Catalog. This suite is unique in that it's designed to represent all four seasons making it great for all occasions. Here's a look at the suite:
For my first project today, I used the Celebrate Sunflowers Bundle. I wanted to create a soft watercolor look for my background. I also though that the center of the sunflower needed to be bigger, so i cut two of the more intricate sunflower images out, one from Early Espresso Cardstock and one from Bumblebee Cardstock. I then cut the center out of the Espresso one and adhered it to the center of the Bumblebee one. Then I just layered the center on to complete my sunflower. I added some Just Jade Gingham Ribbon and a few gems from the Flowers For Every Season Gems to look like dew drops.


My next card uses the Jar of Flowers Bundle. This set comes with a fun jar punch that coordinates beautifully with the set. I used the longer lined image from the set to create a tone-on-tone patterned background by stamping with Mint Macaron Ink onto Mint Macaron Cardstock. After punching my front panel with the jar punch, I used the Mason Jar Shaker Domes inside the punched area to create a 3-D effect. I filled mine with the gems, but you could put all kinds a fun stuff in them like candy, pebbles, the list goes on!

Here's a closer look at the details of my second card:

My final card showcases both sets from this suite. I used the large sunflower die from the Sunflower Dies to create a textured, embossed look which adds a lot of interest. This is a fairly simple technique. You will just assemble your die cutting machine as you would to emboss, except you'll need to add an additional layer(s) of cardstock (shims) to your sandwich. Depending on your machine's configuration, you may need one or more shims. You will just have to test it out to see what works best for your machine. Then you just place your die on top of your cardstock where you'd like it to create the embossing and run it through. It's a really fun look and gives you all the more ways to use your dies, adding tons of value!

Here's a close-up of the effect:

This whole suite was so much fun and a great way to create stunning projects throughout the year. I hope you have enjoyed all of today's cards and designs. Keep hopping along and check out my other fellow teammates’ pages. They have some pretty amazing projects to share. I’ve listed them, along with all products used below or you can just click the link below to hop to the fabulously creative Leah Fedynak.
Don't forget: Stampin' Up! features a corporate blog post each Thursday of the month where we Artisans share creative tips, tricks, and strategies. You can find these posts in the "notes" section of the Stampin' Up! Facebook Page.Thanks so much for stopping by and I’ll see you next post!


