

Everything Is Rosy Memory Album
Hello, everyone! My name is
Lauren Alarid. I’m a Stampin’ Up! demonstrator in California and 2019 Artisan
Design Team member, and I am so happy to be sharing my creativity on the
company blog. Today I wanted to share with you how I created this “Everything
Is Rosy” memory album. It features the new Everything Is Rosy Medley Kit (150059).
This ridiculously gorgeous kit took my breath away from the moment I first saw
it. From the perfectly coordinated items, to the drool-worthy double-sided Designer
Series Paper (DSP), I was completely inspired! And let’s not forget about the brand-new
Rose Gold Shimmer Paint! I just can’t stop making pretty things with it!

Now because this kit is
packed with SO many goodies (It’s basically a “suite-in-a-box”), I knew that I
would have plenty of product to work with to create an entire album (and then
some). Here's a look at the kit in case you missed it in my previous hop:

In today’s project, I have created a mini 6” x 6” album that is so
simple and so fun to make.
To build the basic structure
of your album, you will need 12” x 12” Whisper White Cardstock (124302). Here
are the steps:
1. You will cut this paper directly in half so
that you will now have two 6” x 12” pieces.
2. Repeat this step until you have as many pages
as you’d like in your album.
3. Score each cut sheet in the middle at 6”.
4. Adhere one side of your scored sheet to the
side of another scored 6” x 12” cut piece. Repeat this step until you have
adhered all the sheets together. When you are done, it should look like a book.
5. Next, take a piece of chip board or cardboard
(I use the ones that come with my DSP packs) and cut two pieces that measure 6”
x 6”.
6. Lastly, adhere the first page of your 6” x 12” cut
page pieces to one side of the cut cardboard and then adhere the last page to
the other piece of cut cardboard.

Next you will need to create
the binding. The first step is to choose one of the patterns from the 6 x 6 DSP
and cut it at 6” x 4”. Then adhere it to the front and back edges of your cardboard
cover pages evenly. Take either another piece of coordinating DSP or coordinating
cardstock (I chose Melon Mambo Cardstock (115320) for the front and for the
back I chose the piece of DSP with navy and gold foil leaves) to cover the rest
of your album front and back. I used the Corrugated Dynamic Textured
Impressions Embossing Folder (148026) to emboss the Melon Mambo Cardstock for
added texture. Where the binding and cover pieces met, I used the beautiful
coordinating ribbons from this kit. One is a lovely Night of Navy with rose
gold metallic trim and the other is a Melon Mambo Ruched Ribbon.

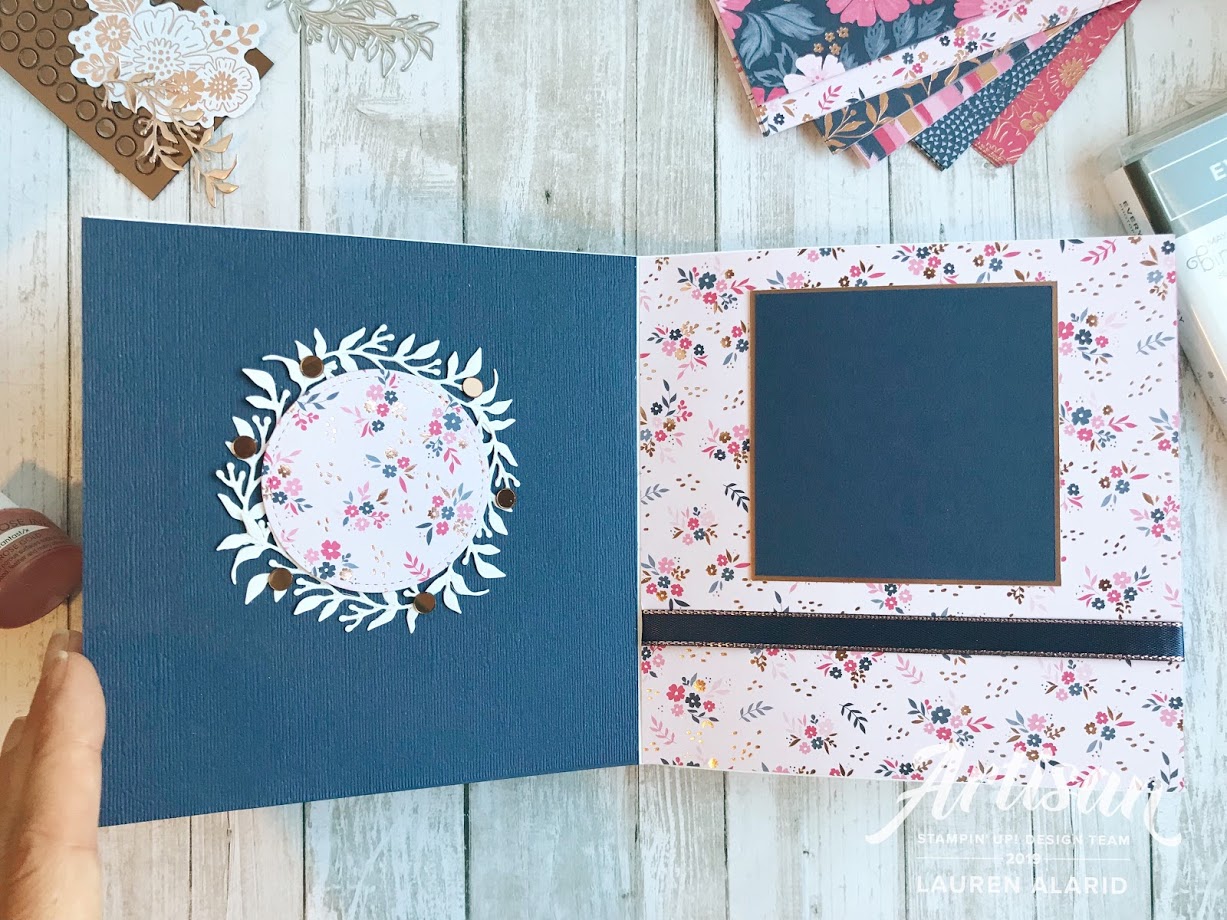
For the inside pages I mixed
and matched the DSP with coordinating cardstock, and used a the fun printed
floral and the rose gold die cuts that come in the kit to embellish my pages. I
included a few word die cuts in Night of Navy (100867) and Melon Mambo
Cardstock from the Well Written Framelits (148534) as well. Other than the word
dies, cardboard, and some ink pads, everything I used to create this album came
from the kit. Here’s a look at a few of the page spreads (below):


I hope that you have enjoyed
this handmade memory album. I truly had so much fun putting it together and the
perfect coordination of this kit made choosing paper, elements, and accents to
adorn it a no-brainer. The best part was that after creating this entire album,
I had tons of product left over! You will definitely want to get your hands on
this kit while you can! It’s to die for!
Lauren Alarid
2018 Artisan Design Team
Here are a few more close-ups of my album pages:


Thanks so much for stopping by and I'll see you next post!
Don't forget! You can find me on Instagram and Facebook! Happy stamping!
Here's a detailed list of everything included in the Everything Is Rosy Product Medley:
- Everything Is Rosy Photopolymer Stamp Set—18 stamps; suggested blocks: a, b, c,
- Everything Is Rosy Dies—10 dies; largest die 2-7/8" x 1" (7.3 x 2.5 cm)
- 6" x 6" (15.2 x 15.2 CM) Designer Series Paper Stack—48 sheets; 8 each of 6 double-sided designs
- 6" x 6" (15.2 x 15.2 CM) rose gold foil paper—8 sheets
- Printed die cuts—2 sheets
- Rose gold die cuts—4 sheets; 2 each of 2 designs
- Rose gold adhesive backed mirror embellishments—60 embellishments; 1/4" (6.4 mm)
- Melon Mambo 1/4" (6.4 mm) Ruched Ribbon—10 yards (9.1 m)
- Night of Navy/Rose Gold 3/8" (1 cm) Metallic –Edge Ribbon—10 yards (9.1 m)
- Rose Gold Shimmer Paint—1/2 oz. (15 ml)
Use my host code (2WE2WWYA) for monthly bonus items. Contact me for more info: Craftylittlepeach@gmail.com
Host A Party
Get your friends together and host a party to earn Stampin' rewards during the month of May! Contact me to book an event!
To order online:
May 2019 Hostess Code:
2WE2WWYA
Or email me @ Craftylittlepeach@gmail.com
2WE2WWYA
Starting January 3, hosts with qualifying orders can receive additional Stampin’ Rewards. Below are the markets, qualifying amounts, and additional Stampin’ Rewards they can receive.


If you’ve considered joining, it's a truly great time! For just $99, you can select $125 of your choice of product AND earn a 20% discount on purchases from the Annual Catalog. This is an amazing deal! If you want to join my team, click here or please email me!

Supplies:


Wow, wow, wow!!!! Absolutely gorgeous!!! I love it!
ReplyDeleteLove it! I’m almost done with mine. Just a few quick questions. It looks like you used a stencil & paste I bossed on one of your pages, is that correct? Which stencil did u use?
ReplyDeleteThank you so much for your inspiration. I believe your the only one I could find that made an album with this beautiful suite except for some in a different language. So I’m sooo happy I found you
Hugs Carole